Have you ever found yourself overwhelmed by too many options while shopping online? Imagine being able to streamline your search to pinpoint exactly what you're looking for. For Shopify store owners, custom filters offer a powerful way to enhance the shopping experience, helping customers find precisely what they want.
This post will explore how to implement custom filters by metaobject in Shopify, whether you're a seasoned user looking to refine your setup or a newcomer eager to get started. We'll cover the basics of metaobjects, adding filters using metaobjects for personalized filtering.
Adding product filters with metaobjects
Shopify's metaobject feature allows you to create custom data models tailored to your needs, going beyond Shopify's standard options. This guide will take you through setting up and adding product filters using metaobjects on your collection and search pages.
1. What are Shopify's metaobjects?
Released in Winter 2023, metaobjects are among Shopify's newest features. They allow you to group multiple metafields into a structured and reusable format, perfect for showcasing complex content across different pages. Metaobjects, like metafields, can be linked to a Shopify resource such as a product or collection. They help organize and manage these relationships, making it easy to update all instances from a single location. If you have sections of your store that appear on multiple pages, metaobjects are a practical choice.
2. Adding Metaobjects to Your Products
Adding metaobjects to your Shopify pages involves several steps: creating the metaobject, entering data, defining metafields that reference the metaobject, linking metaobject entries to products, and publishing them on your storefront.
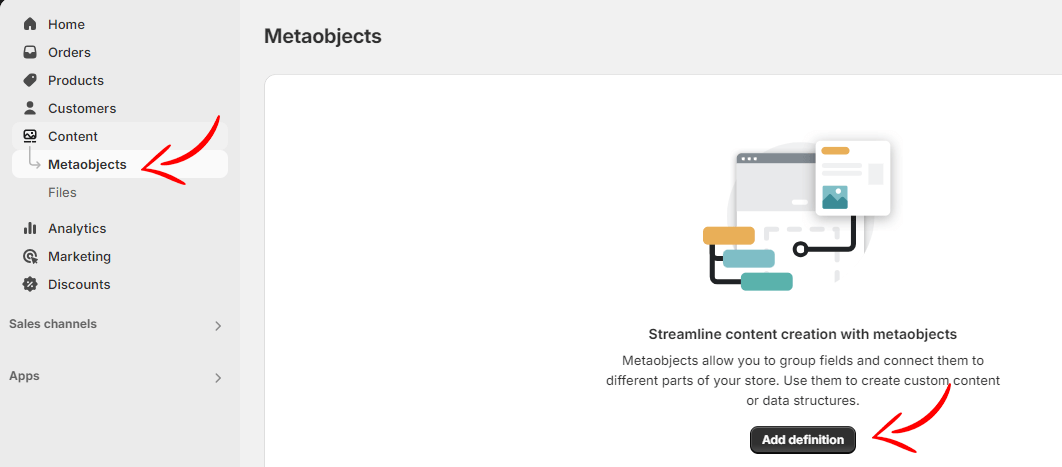
Step 1. From the Shopify admin, navigate to Content > Metaobjects
Step 2. Click "Add definition" to create a new metaobject.
Step 3. Enter a name in the Name field. A type for your metaobject will be generated automatically but can be edited.
Step 4. Click "Add field" and choose the type of content you want to include, such as single-line text. Each field has its own options and validation rules.
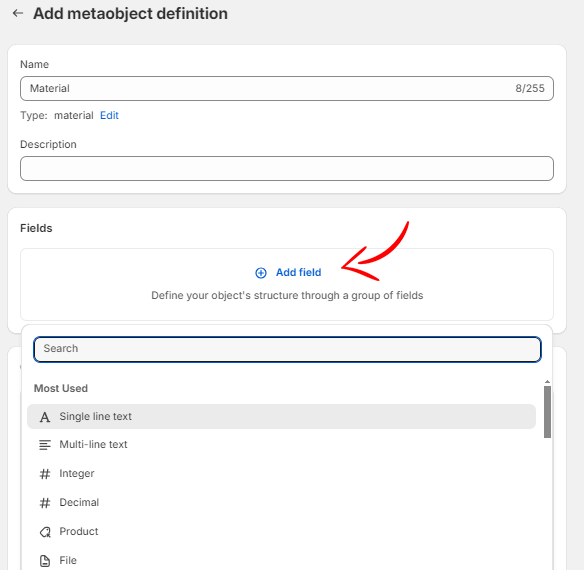
Step 5. You'll find that there are three sections for creating your metaobject:
- Name: Choose a name for your metaobject.
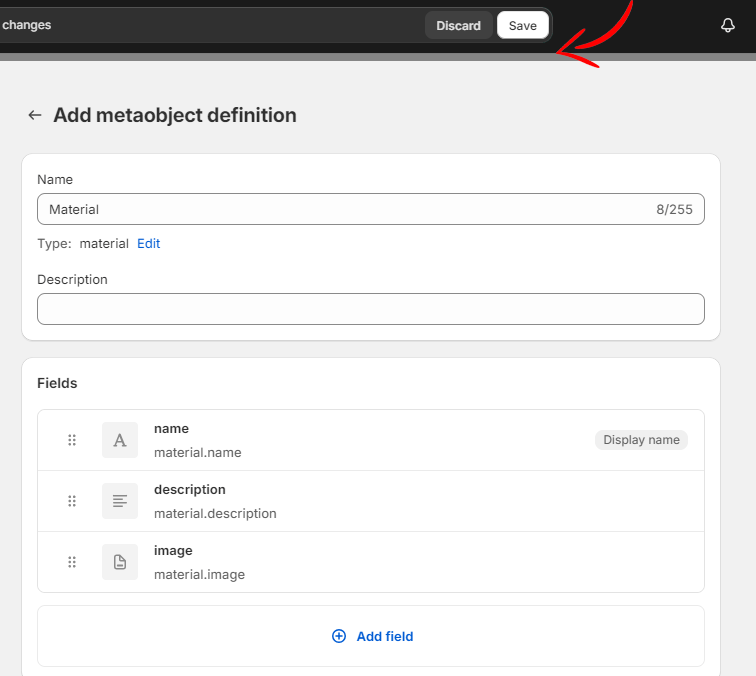
- Fields: This section allows you to define the structure of your metaobject. You have a variety of field options to choose from, including text, numbers, colors, and more.
- Options: The 'Storefront' option is enabled by default, ensuring your metaobjects are displayed on your live site. You can also enable the 'Web pages' option, which allows you to create landing pages with unique URLs using your metaobject.
Step 6. Click Save to complete the process.
Step 7. Next, create a product metafield that references your metaobject. Go to the "Custom data" settings and select "Products."
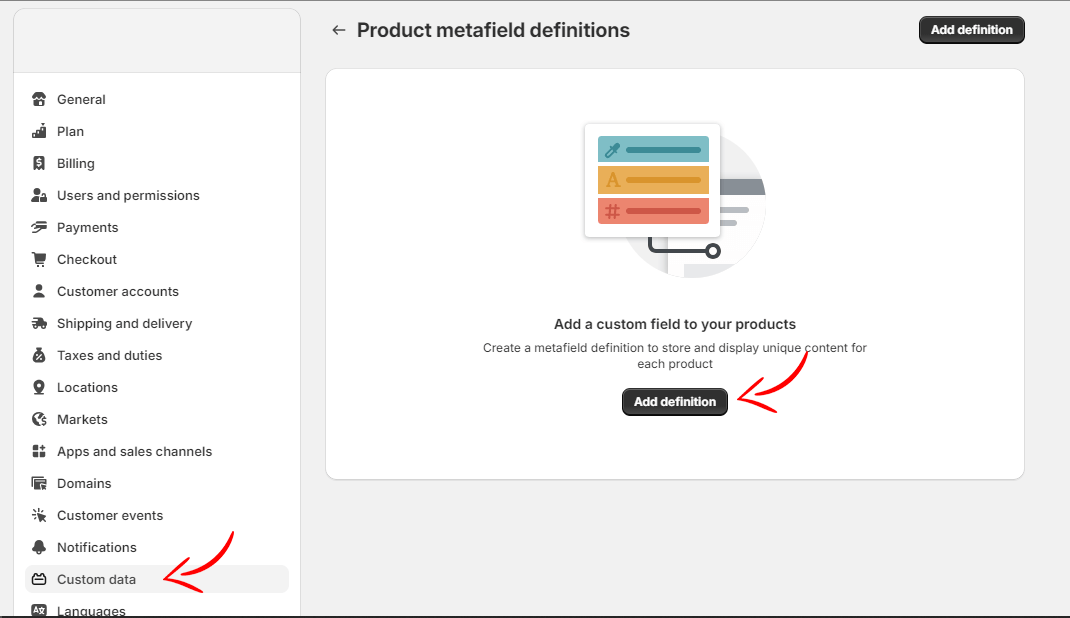
Step 8. Click "Add definition" and select "Metaobject" from the "Select type" menu.
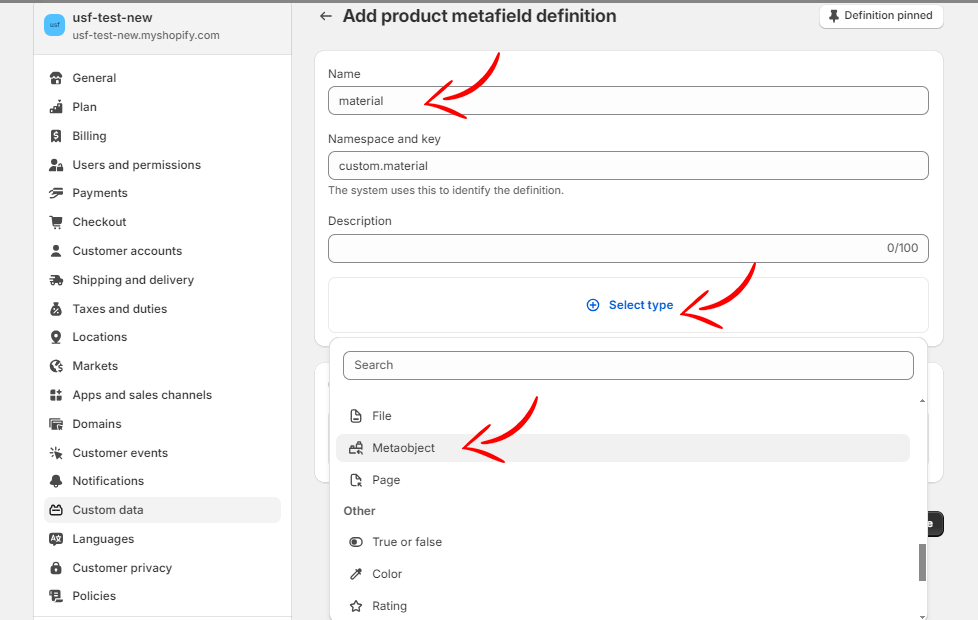
Step 9. Choose the metaobject to reference, add a unique name and description, and save.
Step 10. To link a metafield entry to a product, go to "Products" on the Shopify main dashboard.
Step 11. Select the product you wish to update.
Step 12. Scroll to the "Metafields" section and find the metafield that references your metaobject.
Step 13. Save your changes to update the product page.
3. Creating Product Filters with Metaobjects
With metafields in place, you can now create custom filters using the Sobooster AI Search & Filter app.
Step 1. Install the AI Search & Filter | SB from the Shopify app store.
Step 2. Open the app, go to "Settings/Search index," and add metafields to the search index.
Step 3. Add filters by metafields. AI Search & Filter |SB app helps create filters by metafields in range or list or swatch.


